Creating a diptych
Although shot as single images, my pre-visualisation for this shoot was the diptych at the end of this post.
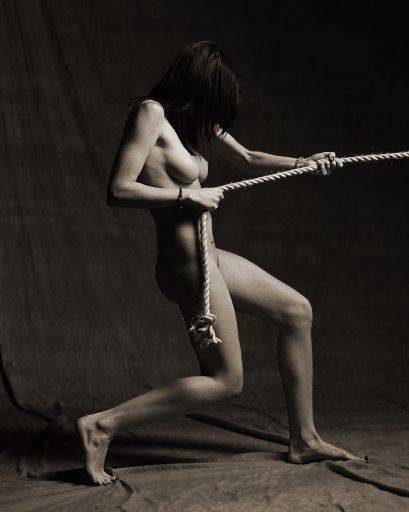
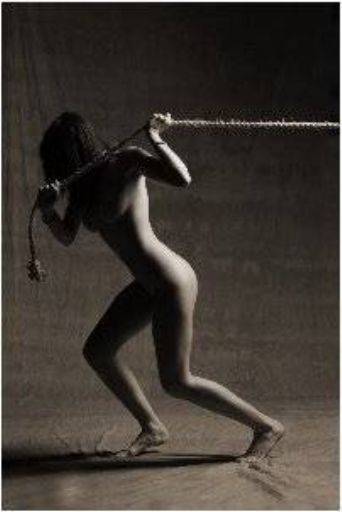
First the model is shot pulling in one direction, then in the other.
I really wanted a very intense look - and so the model really had to pull as hard as possible on the rope to get the correct feel.
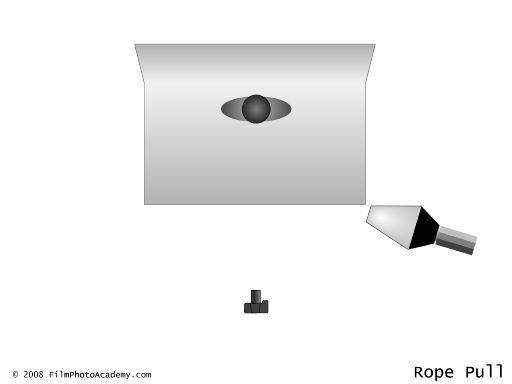
Lighting Diagram
The scene is lit by a single narrow softbox to one side giving hard shadows and shadow transitions.
It is no good just flipping an image to form the right hand side, the shadows would be pointing in the wrong direction.
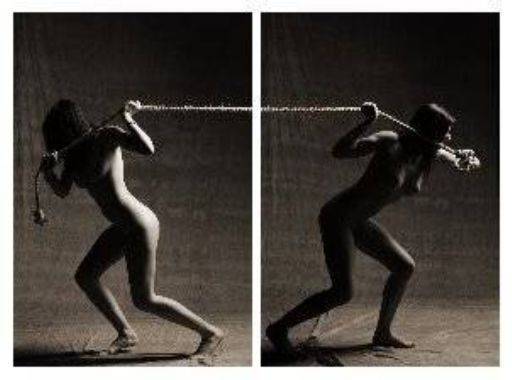
And this is the final diptych.
Model: Laura Summer
share:
You can learn how to develop your own lighting, posing and directing skills with our extensive and intensive range of video programs available on DVD or download.
Videos on DVD / Download